


When you upload an image to WordPress, it automatically generates several additional versions — such as thumbnail, medium, and large sizes — besides the original file. This is actually one of WordPress’s key optimization features designed to improve website speed and enable responsive design.
However, sometimes this feature can feel unnecessary. It can take up extra server space or prevent you from having full control over your image dimensions.
In this guide, you’ll learn how to disable WordPress’s automatic image generation feature so that only the original image is kept when uploading new files, and how to delete previously created resized images cleanly.
1. Why Does WordPress Automatically Generate Multiple Image Sizes?
Before disabling this feature, it’s worth understanding why WordPress includes it by default. The main reasons are performance optimization and responsive web support.
1.1 Faster Page Loading Speed
For example, if a 4000px-wide original image is loaded on a mobile screen that’s only 360px wide, users end up downloading a massive file they can’t even fully view. That’s wasted bandwidth and slower loading speed. To prevent this, WordPress automatically serves the most appropriate image size depending on the user’s device. 
1.2 Responsive Web Design Support
Modern websites are built to adapt flexibly to various screen sizes.
WordPress registers automatically generated image sizes in the <img> tag’s srcset attribute,
allowing browsers to select the image that best matches the current display size and resolution.
As a result, users see sharp yet optimized images on every device.
1.3 Theme and Layout Flexibility
Different parts of a WordPress theme—such as blog listings (small thumbnails), post bodies (medium images), and page banners (large images)—require different image sizes.
Pre-generated images allow the theme to display them quickly and consistently across all sections.
Summary
This feature may use some extra storage, but it provides significant benefits in terms of user experience (UX) and SEO performance.
Still, if you prefer to disable it and keep only original images, proceed with steps 2 and 3 below.
2. Stop Generating Resized Images for Future Uploads
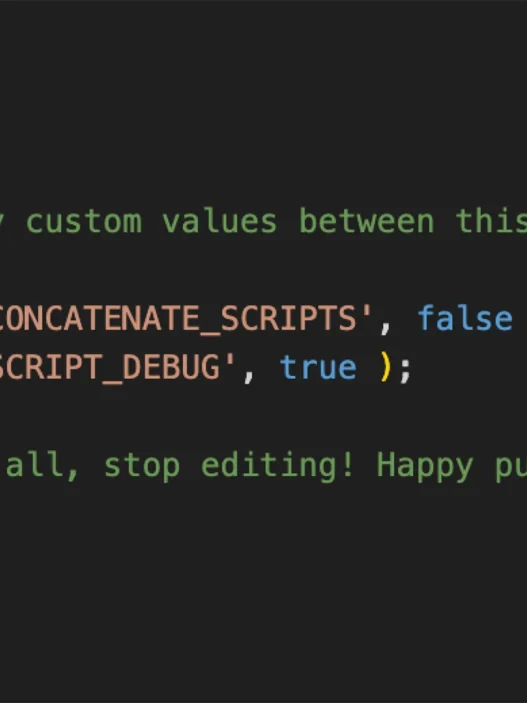
To prevent WordPress from creating additional image sizes and only keep the original upload, add the following code to your theme/functions.php (or child-theme/functions.php) file:
/* Disable all automatic image resizing (keep only original) */
add_filter( 'intermediate_image_sizes', '__return_empty_array' );

/* Remove default WordPress image sizes (thumbnail, medium, large, full) */
function disable_default_image_sizes( $sizes ) {
   return array();
}
add_filter( 'intermediate_image_sizes_advanced', 'disable_default_image_sizes' );
Once you’ve added and saved this code, any new image you upload to the WordPress Media Library will be stored only in its original size — no resized copies will be created.
3. Delete Previously Generated Resized Images
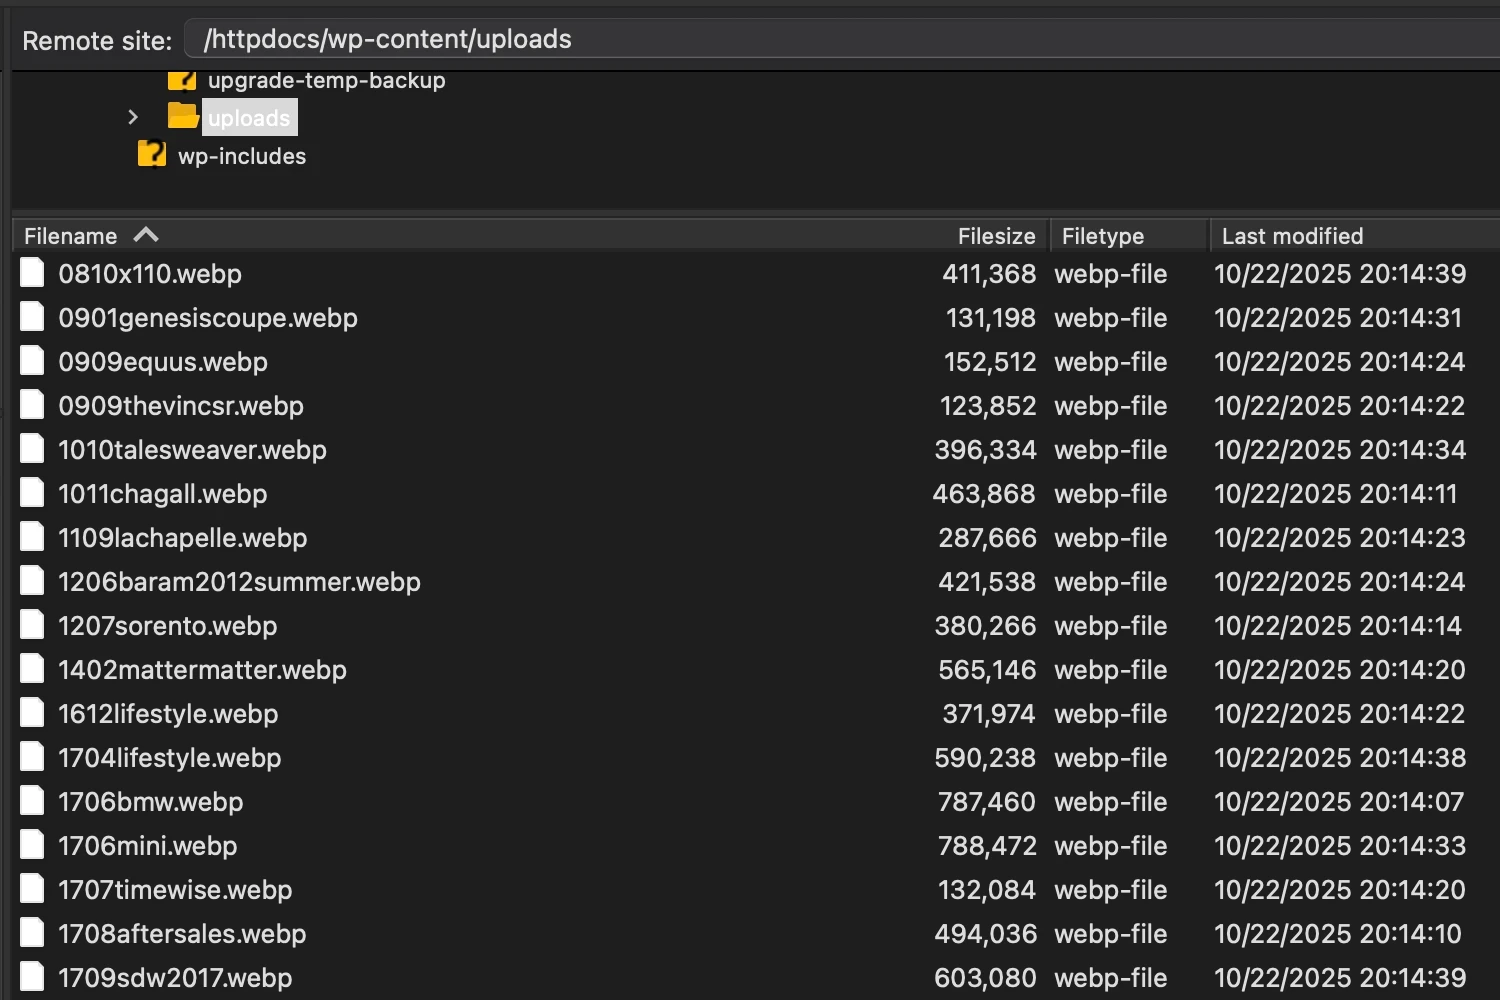
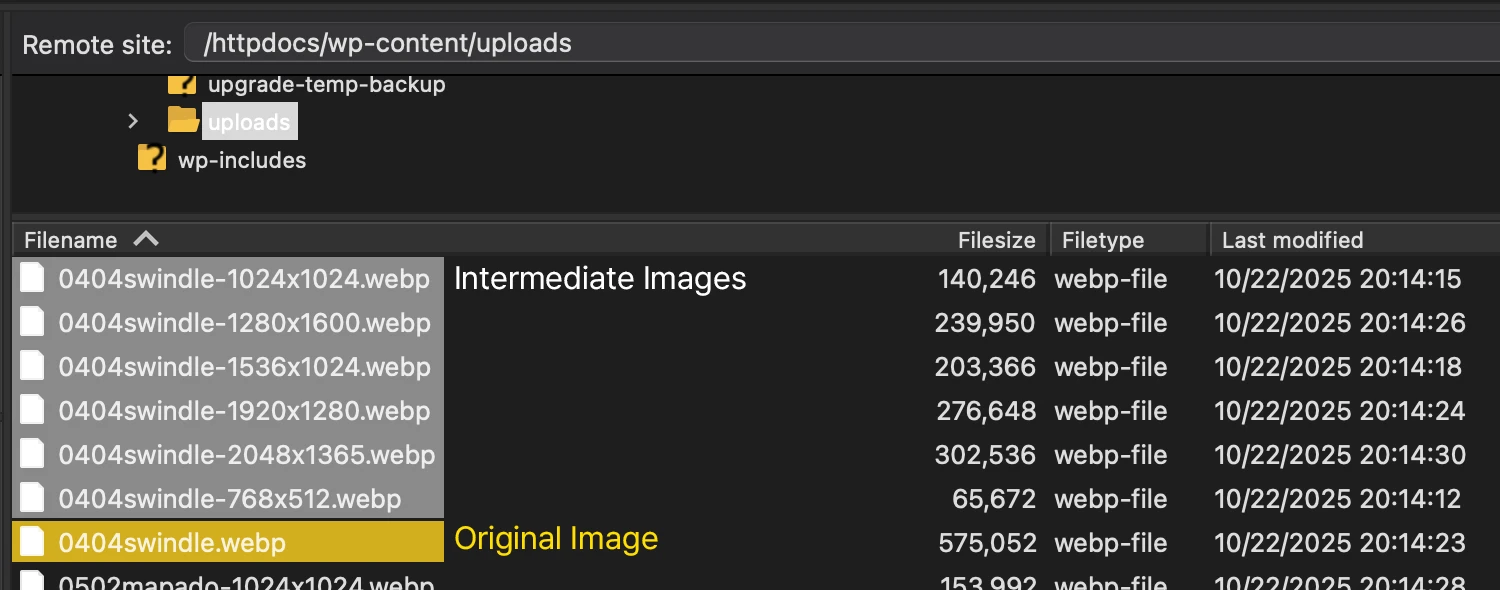
Even after step 2, all previously uploaded resized images will remain on your server.
If you check your /uploads folder via FTP, you’ll likely see many derivative files with names like -1024×1024 or -1536×1024 appended to them.
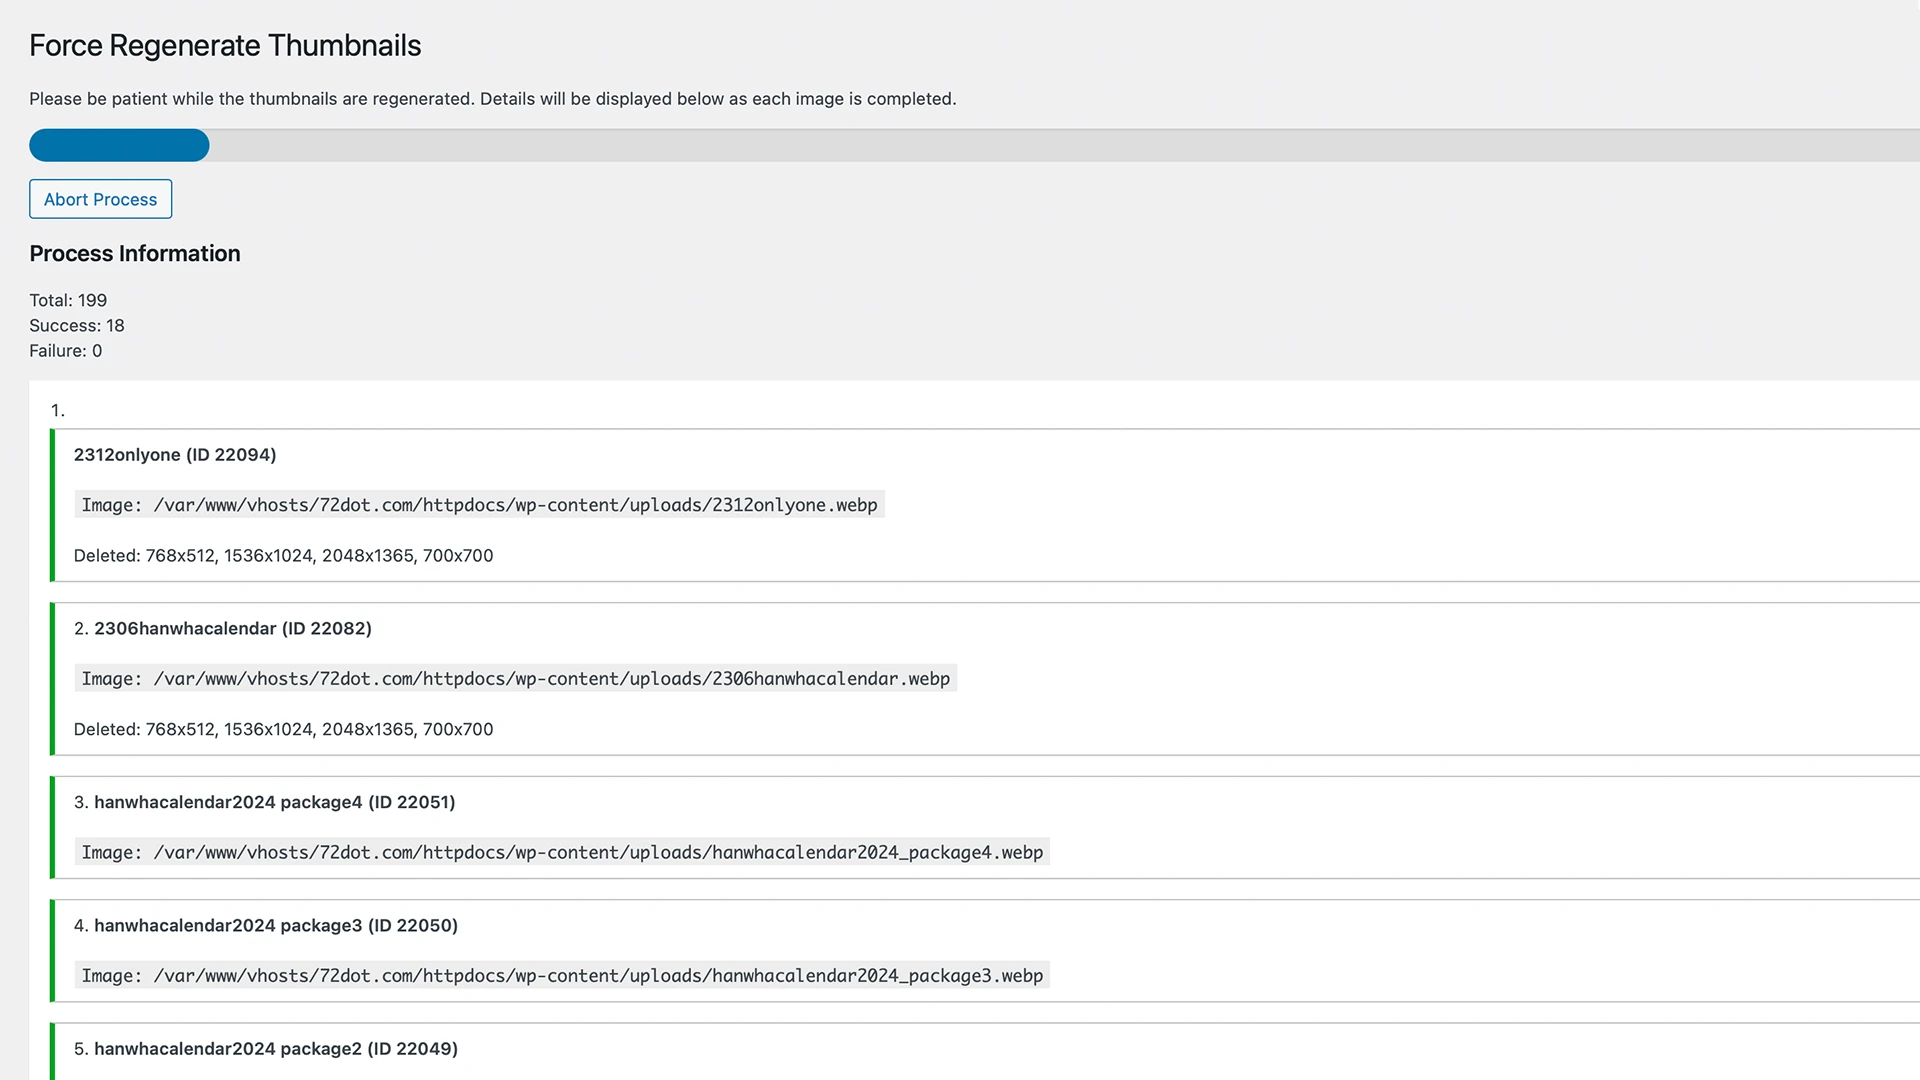
To delete these effectively, you can use the “Force Regenerate Thumbnails” plugin — but in reverse.
- Important: Complete step 2 (add the functions.php code) before proceeding.
- Install and activate the plugin ‘Force Regenerate Thumbnails’ downloadDownload
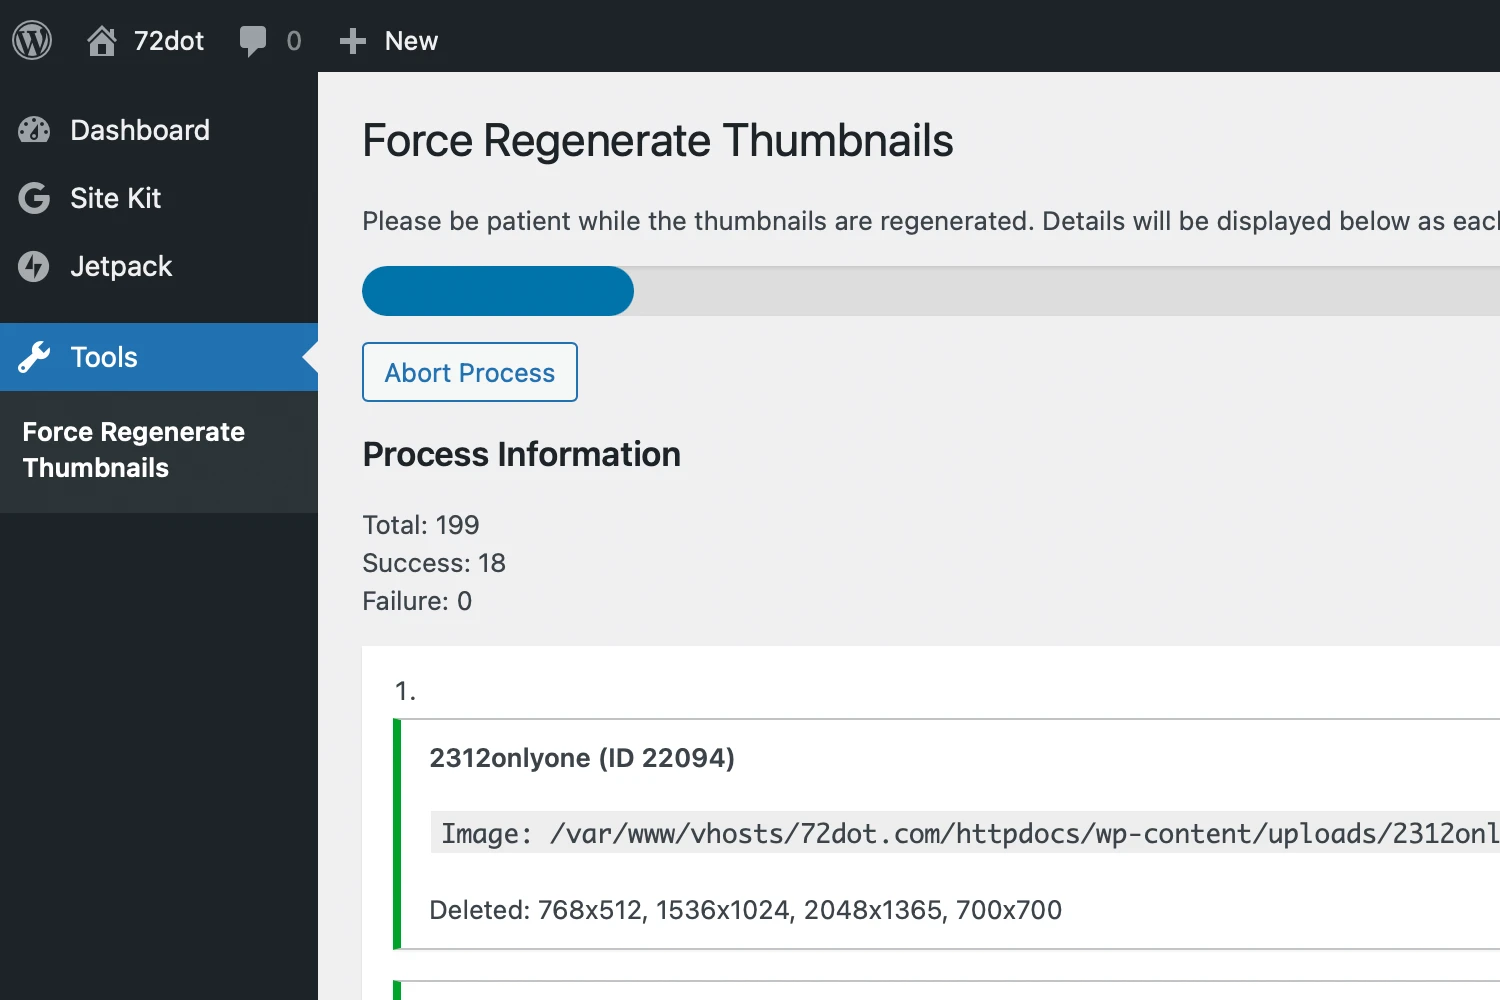
- Go to Tools > Force Regenerate Thumbnails
- Click the ‘Regenerate All Thumbnails’ button.
How it works
Normally, this plugin deletes all existing thumbnails and regenerates them according to your current image settings.
However, since we’ve set WordPress to generate no additional image sizes (__return_empty_array), the plugin will only perform the deletion step — without creating any new images.
The result: all resized image files are cleanly removed, leaving only the original versions intact.