


When your server’s clock is out of sync with the actual time, you can use chrony, a daemon that utilizes the NTP*, to correct it. Here’s a step-by-step guide on how to set it up.
* NTP Server : A server that uses the Network Time Protocol (NTP) to synchronize the clocks of computers over a network.
1. Check Your Server’s Current Time
First, use the date command in your terminal to see your server’s current time and determine how much it differs from the actual time.
date2. Install and Run Chrony
Install the chrony package and configure it to start automatically on system boot.
2.1 Install the Package
sudo apt-get install -y chronyThe -y flag automatically answers ‘Yes’ to any installation prompts. 
2.2 Enable and Start the Service
Set chrony to start automatically on boot
sudo systemctl enable chronydStart the chrony service
sudo systemctl start chronydCheck the chrony service status
sudo systemctl status chronydAfter checking the status, you can press the q key to exit and return to the command prompt.
3. Configure NTP Servers
Edit the chrony.conf file to add reliable time servers.
3.1 Open the Configuration File
Use a terminal editor like vi or nano to open the configuration file with sudo privileges.
sudo vi /etc/chrony/chrony.conf💡 Not familiar with terminal editors?
- Run
sudo chmod 666 /etc/chrony/chrony.confto grant write permissions to the file. - pen the file with your preferred editor (like
VSCode), make the changes, and save it. - For security, you must revert the file permissions by running
sudo chmod 644 /etc/chrony/chrony.confimmediately after.
3.2 Edit the Time Server List
Inside the file, delete or comment out (#) the existing lines that start with server. Then, add the recommended list of servers below.
# Remove existing pool/server lines and add the following:
server time.google.com iburst
server time.apple.com  iburst
server time.aws.com.   iburst
server time.nist.gov   iburst
3.3 Restart the Service
Once you’ve saved your changes to the configuration file, restart the chrony service to apply them.
sudo systemctl restart chronyd4. Verify the Synchronization
Finally, check if chrony is communicating correctly with the time servers and that synchronization is working as expected.
4.1 Track Synchronization
Check the overall sync status, including the current time offset, correction speed, and the primary reference time server.
sudo chronyc tracking4.2 Check NTP Server Status
View a detailed list of the NTP servers you’re connected to, along with their latency, offset, and stability.
-v is the verbose option.
sudo chronyc sources -v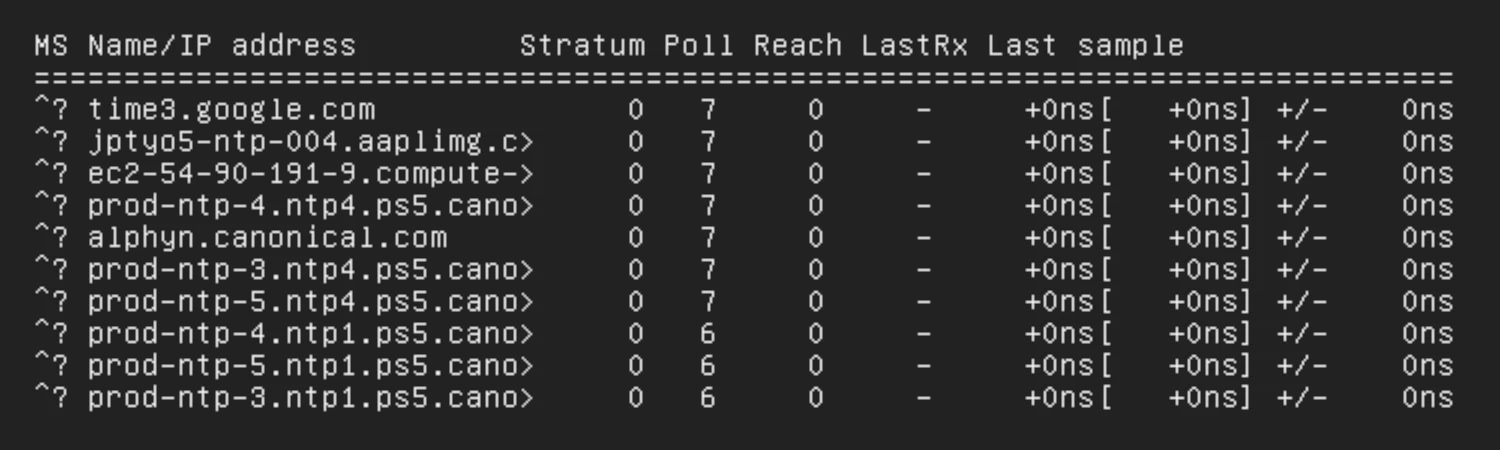
After running the command, check the offset value. If it is large, run the immediate synchronization command below.
4.3 Force an Immediate Sync
If the time difference on your server is very large, you can use the following command to force an immediate synchronization.
sudo chronyc makestep